
Hi recently tried the https://lasatlantis.com/game/wolf-moon-pays/ at Las Atlantis - it's a real delight! The game's wildlife theme is beautifully realized with high-quality graphics and exciting sound effects that make you feel like you're in the wild. A unique bonus round where you can accumulate wins using the moon phases adds a fantastic twist to the gameplay. It's not just fun, but a real sense that the strategy has real depth. In addition, Las Atlantis ensures that the game is always smooth, thanks to fast loading and responsive software
Analog Corner #2
(Originally published in Stereophile, August 12th, 1995)
Michael Fremer invites you to join the band for under a grand
I figure two categories of non–analog-owning audiophiles are reading this column (footnote 1)—younger ones who've never heard good or any pure analog; and older audiophiles who may have been pushed out by the bad advice regularly spewing from the pages of "mainstream" stereo magazines in the days just before CD.
Their prescription for playback perfection? Track lightly on a PLL direct-drive turntable (and since all turntables sound the same, any one will do). I swallowed a large dose of that myself during the early ‘70s, marginalizing my listening enjoyment and ruining many of my favorite records in the process.
A direct-drive turntable is great for a disco—it's up to speed in a quarter revolution, and it takes a dumbbell to stop. Unfortunately, with the motor part of the platter, it's very difficult to isolate the bad vibes from the ones in the grooves. With a PLL circuit always hunting for and never finding 331/3, the system is always making speed adjustments—the small, fast, herky-jerky kind that bother the ears the most.
That's why, with the exception of the now-discontinued Goldmund Reference, every turntable with audiophile pretensions features belt drive. Speed "drifts," but it does so slooooowly and imperceptibly.
Light tracking seemed like a good idea when it was in fashion: don't press down too heavily and the vertical modulations won't be sheared from the grooves. Unfortunately, track too lightly and it's like overinflating your tires: the rubber can't grip the road, and you careen all over the highway. Every time the stylus hits the vinyl guardrail, it rips out a chunk.
You didn't need measurements or particularly good ears to hear this stuff back then, you just needed to listen—something not enough audiophiles were doing. They read. They believed. They followed. I know—I was one of them.
Fortunately, I got my front end straightened out before CD. In 1982, a high-performance, belt-drive turntable properly set up easily outperformed a first-generation CD player. Today's better ‘tables continue to beat CDs. And that doesn't mean you have to spend $2000 on a phono cartridge or $5000 on a turntable.
Start-up
Let's start from scratch. Oops—unfortunate choice of words for this column. Let's start from the beginning. If I did my job in last month's column, you've now got the analog bug and you want in, but you don't want to spend big bucks. Maybe you hit a few garage sales since we last spoke, and you lucked out.
I did a few days ago. I found a Dual 1229Q with a Shure V-15 Type III for $5. That top-of-the-line (early ‘70s) Dual has a full 12” platter, adjustable VTA (two positions: manual and auto play), and a dual-gimbal arm (dual bearings in both the horizontal and vertical axes). The 1219 I owned in the ‘70s took good care of my records and didn't sound bad at all.
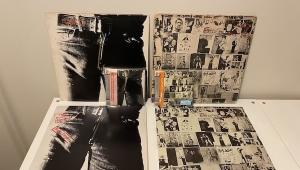
I also found some LPs: Steve Reich's Drumming and other works (Deutsche Grammophon 2740 106, 3 LPs), and Tehillim (ECM 1-1215); Keith Jarrett's Solo Concerts: Bremen and Lausanne (Japanese ECM PA 3031-3); You're the Guy I Want to Share My Money With (GPS 020-021), with Laurie Anderson, John Giorno, and William S. Burroughs; The Best of Chicago Blues, a Vanguard twofer (VSD 1/2) with Otis Spann, Junior Wells, Buddy Guy, Big Walter Horton, J.B. Hutto, and others; another early Laurie Anderson (plus other composers) on Arch Records; and a Japanese LP of some cat playing a shakuhachi. All of these mint-condition LPs for ten bucks.
The stuff is out there; so again, for those of you still hesitating, get up off your audiophile butts and hit the analog trail—unless your idea of a good time is listening to "audiophile" CDs of third-rate talent while measuring soundstage penetration. The thought leaves me limp.
Much of what follows will be painfully obvious to some of you analog vets. All I keep flashing on are the idiotic manuals that come with computer equipment. The dweebs who write them are so into the stuff that they bypass the most basic questions that those of us who don't have computers on the brain want answered. For example, the manual for my printer tells you everything but how to load the g**damned paper.
Let's not even get into the non-directions that came with my idiot modem. So, yes, what follows is like the haberdashery equivalent of don't-forget-to-button-your-shirt-and-zip-your-fly. If you've never worn pants, you'd like to know. If you've never owned a turntable, there are equivalent basics you need to know. And if you're a line-section-only audiophile, we've taken care of that, too. So zip your fly and read on.
Dual Purpose
If you've found, or you're going to go out looking for, a Dual turntable on the cheap, you're likely to find a 1218, 1219, or (less likely) 1229Q (the Q stands for quad). There were less-expensive Duals available (the 1214, for example), some older ones, like the 1009SK, and some more plastic-laden later models—some of which were belt-driven and actually quite desirable. You may find the later CS models or models in the 5, 6, 7, or 8 series. Whichever you find, you should be able to get it for (with some later exceptions) 50 bucks or less (footnote 2).
This isn't the appropriate place for a tutorial on Dual ‘tables, their care, or maintenance, but a few quick points to start you in the right direction: the 1218, 1219, 1229, and others of that vintage were idler-wheel driven. If you find one of these, clean the drive wheel with glass/chrome cleaner, lift off the platter by removing the "C" clip around the spindle hole, and clean the inside rim of the platter and the rubber idler wheel with ethyl alcohol or 99%-pure rubbing alcohol. A fluid specially designed for tape-recorder pinch wheels, such as Intraclean S-711, is preferable, because it won't dry out the rubber; but alcohol will do—I used it for many years on my Dual 1219 without problem. Also, clean the stepped brass capstan that drives the wheel.
Replace the platter and start up the ‘table. If you don't get good torque from the system (ie, you can easily stop the platter with your finger), either the wheel or the motor is shot. Remove the platter and start the motor by moving the arm toward the center. Try stopping the capstan with your fingers. If there's good torque there, the problem's with the wheel. Sometimes you can "refresh" it by rubbing its circumference lightly with emery cloth (be careful to collect the fallout). Replace the platter and "C" clip, and you're ready to install a cartridge.
On a Dual, the cartridge mounts in an insert that's released from under the headshell by pushing the finger lift straight back. Once you've done this you'll see four contact points in the headshell and four spring-mounted pins on the insert. Clean both with alcohol, Kontak (better), or some other cleaner.
Also, with most Duals you can replace the RCA cords that plug-in to jacks under the chassis and replace the ribbed (for greater pleasure—so they thought at the time) turntable mat with one of your choosing.
Alignment
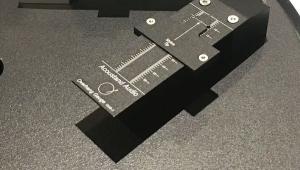
Whether you resurrect a Dual or start with a new ‘table, you'll need to have certain tools and supplies on hand if you're going to mount the cartridge yourself—and at this point in analog time, it's better to be self-reliant. You'll need an alignment device to set the overhang—the specific place where the cartridge tracks across the record with the least amount of geometric error relative to the cutter head's straight travel across the original lacquer used to manufacture an LP. Finding that arc is critical to both the sound and the longevity of your records. Again, the point of this column is to get you going, not to engage in a long-winded discussion of overhang theory—yes, controversy exists here, too.
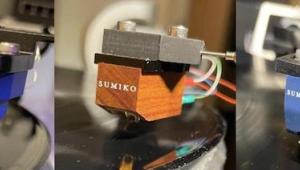
Mobile Fidelity is once again manufacturing its "Geo-disc" ($24.95) alignment disc; and Lyle Cartridges, a Long Island supplier of analog products and a regular Stereophile advertiser, makes its own inexpensive grid. Dennesen still makes the metal version of the "Soundtracktor’’—an alignment compass that is, to my mind, the best gadget available. If you find one used, snap it up. A new one, available through Sumiko, unfortunately costs $195. DB Systems' Protrac ($35) is another device worth checking out.
You can also try to find a used copy of Telarc's "Omni-Disc’’—a two-disc set with both music and test tones plus an alignment gauge etched right into the vinyl. Telarc ought to put it back into production, but don't hold your breath.
You'll need a stylus-pressure gauge: the only commercially available one I know of is Shure's SFG-2, which is an inexpensive, fairly accurate fulcrum device. Technics used to make a sexy-looking electronic gauge, but those go for big bucks on the used market; and, as with the Shure, some of its metal parts may be attracted to the cartridge magnet, making it less than completely accurate.
When using the Shure, try to position the cartridge body as far away from the metal platform as possible. AR used to make a plastic seesaw gauge, but excessive friction kept it from being accurate. In addition, in a reprise of a cruel, adolescent, locker-room taunt, you'll need tweezers and a magnifying glass—and a bubble level.
Now you're ready to mount your cartridge. My goal for this column was to assemble a credible, under-$1000 analog front-end. What do I mean by credible? I mean one I could live with; one on which I would play my most valued records; and one that, despite its modest cost, could do what analog does best and match digital at what it does well.
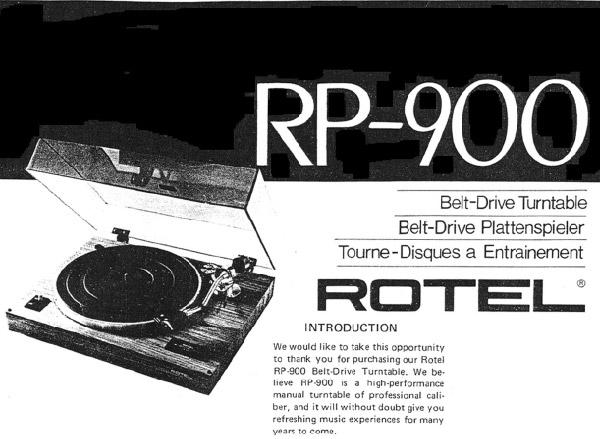
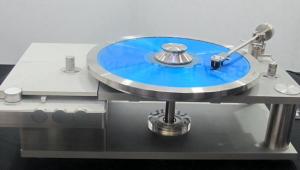
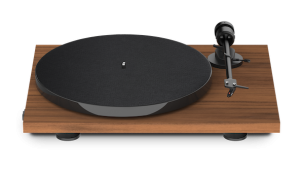
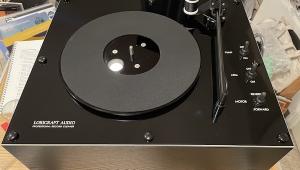
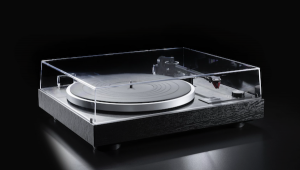
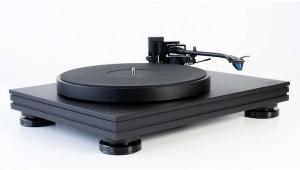
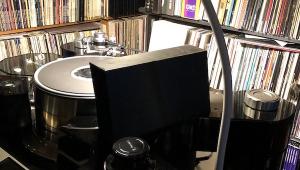
I chose the Rotel's $500, UK-made RP 900 belt-drive turntable, which uses Rega-supplied components. The OEM version of Rega's RB 250 arm is a solidly built, medium-mass, tapered tube design with built-in anti-skating and damped cueing. Rega also supplies Rotel with the main bearing, the central hub and glass platter, and the felt mat.
The plinth, on which the arm and platter are mounted, sits on four sprung rubber feet. Plinth/motor isolation is accomplished via a three-point spring suspension. If you've got shaky floors, you'll be unhappy with this setup; however, my experience has been that if you have bouncy floors, you're not going to be happy with any turntable that's not mechanically grounded to a wall or physically attached thereto. So let's assume you've got a firm tabletop and a firm floor.
If you don't, hopefully the thing you choose to place your turntable on will be close to a wall—and a load-bearing one at that. If you do experience the bouncies, ground the furniture to the wall by wedging wood between it and the wall, or get a couple of turnbuckles at a hardware store and turn the screws to expand them until the looped ends press firmly against the wall and your "stand." That usually does it.
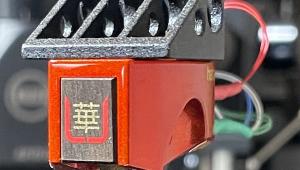
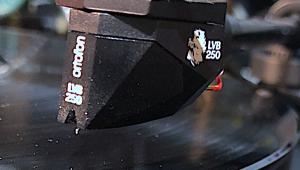
Let's get the cartridge mounted. I chose what I consider to be a budget "reference’’—Sumiko's $195 Blue Point high-output moving-coil. Other choices are available at this price point, and some very fine cartridges are priced lower, but I find the Blue Point's overall resolution, speed, and portrayal of dynamics an attractive combination—even if it does have a bit of zip on top. If you want something mellower, try a Grado or Audio-Technica moving-magnet model. The $200 Grado 8MZ is sweet- and smooth-sounding, with a "warm zone" in the lower midbass. The Rotel can play 78s (you have to change the motor pulley, which is simple), so if you're into the really old technology, consider a Grado, which can be fitted with an easily interchangeable 78rpm stylus.
If you're doing a Dual, the fact that the cartridge mounting insert comes out makes initial mounting easy. In the Rega and other fixed-head arms, installation is a bit more difficult. Work slowly, be patient, and remember: You can't replace the stylus on a moving-coil cartridge, so be careful, and always keep the stylus guard down.
First, slip the four color-coded wires over the cartridge pins (usually red is right "hot," white is left "hot," green is right "ground," blue is left "ground’’). Here's where tweezers or small needle-nosed pliers come in: don't use your fingers, or you're liable to break off the connector. Be sure to grasp the connector by the end tab, where the wire is soldered on. If you squeeze the hollow receptacle, you'll likely narrow the diameter of the opening, making it much more difficult to slip over the cartridge pin. Force it and you'll probably break off the connector, or you'll slip and lunch the stylus—or both! Such fun. Whatever you do, don't solder the wire back to the connector while it's attached to the pin—you'll destroy the cartridge.
Sometimes the diameter of the cartridge pin is too small for the connector and the fit is too loose. (You'd think the industry would standardize such things, but it hasn't.) In that case, you'll have to squeeze the connector slightly (off the pin) until the pin/connector interface is secure. Once you've got the connector partially on the pin, you can grasp it by the tubular part.
Most moderately priced new cartridges come with mounting hardware—none of which is really of adequate quality. Buy a set of high-quality screws and nuts if possible when you order your cartridge.
With a Dual you'll have to mount the cartridge with the screw heads on top so there's sufficient clearance to reinstall the insert, which fits snugly against the headshell. Otherwise you can install the screws from the bottom up—which is easier, and which makes their length less critical. Be sure to install a nylon washer on the screw before fitting it through the cartridge body. Tighten the screws so the cartridge doesn't slide around, but not so tight that you can't move it easily along the mounting slots.
On your Dual insert the mounted cartridge holder at a 45º angle first, then rotate the front end up until it's flush with the headshell. Carefully push the finger lift forward until it's perpendicular to the headshell. It should be securely locked in place. Don't force the fingerlift! If it doesn't swing easily, the cartridge assembly isn't properly aligned under the headshell.
Now the fun begins. First, rotate the counterweight on the arm until it barely floats over the record. Set the anti-skating to zero. On some Duals the entire counterweight assembly slides on a shaft held in by a knurled nut mounted on the side. Start by screwing the counterweight in all the way. Then loosen the nut and slide the entire shaft out until the arm just begins to float. Tighten the nut and make fine adjustments by rotating the counterweight until the arm floats over the platter.
On the Dual you dial-in the tracking force with a built-in gauge. Most other arms require the use of an external gauge. For now, set the tracking force to the lower limits suggested by the manufacturer by tuning-in the counterweight.
Following the directions on the alignment device you've obtained, carefully set the overhang by sliding the cartridge back and forth, making sure the stylus tip is precisely centered in the dimple or circle that indicates proper overhang. Also be certain the body of the cartridge (or, better yet, the cantilever itself) is squared with the hashmarks on the gauge. With the Dual, you're going to have to remove the headshell insert each time you reposition the cartridge. Take your time with this part of the setup—don't lose patience, and don't be under the influence of substances, legal or otherwise, while you're doing this!
If the screws are too loose for the cartridge to hold its position, tighten them. If they're too tight, loosen them. This part of the setup is probably the most critical for obtaining good analog sound.
Once you're certain the overhang is correct, tighten the screws. How tight? Not too tight, but tight enough that the cartridge can't move around. Now, carefully set the tracking force to the upper limit suggested by the manufacturer. Don't track too lightly!
Check the overhang again. Increasing tracking force will deflect the cantilever and possibly change the overhang adjustment. Yes, this is a pain in the butt, but once you're done, you shouldn't have to do it again for a very long time.
Now set the anti-skating to the same value as the tracking force. There are test records available to help you precisely dial-in the anti-skating; but in my experience, at this basic level of performance, unless you hear distortion on the inner grooves, matching tracking force and anti-skating should do the trick.
Neither the Duals nor the Rotel allow you to adjust vertical tracking angle (VTA). Putting spacers under the headshell to raise the front end of the arm does more damage than good, so forget about VTA for now.
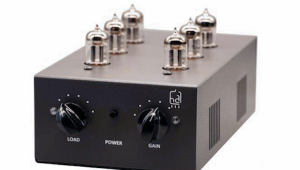
Phono Amps
Wow! We're almost ready to play records. If your preamp includes a phono section, plug your ‘table in and be sure to attach the ground wire to the grounding screw located next to the phono jacks on most preamps. If your electronics are strictly "line-in," don't worry: there are more analog "black boxes" available today than there were digital ones once high-enders had heard how bad off-the-shelf CD players sounded at the dawn of the digital error...era.
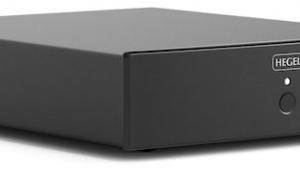
Two black boxes worth considering are Creek's $199 OBH-8 and Audio Alchemy's $259 VAC-in-the-Box. The moving-magnet/high-output, moving-coil step-up Creek is a basic plug-in-and-play unit; the Audio Alchemy allows you to set loading and gain, and offers the flexibility of a circus contortionist and enough gain for low-output moving-coil cartridges. A load impedance of 47k ohms and about 32dB gain are correct for the Blue Point. Plug your ‘table in to the black box of your choice, and, using a pair of good-quality interconnects, plug the black box in to a line-in input on your preamp. Now you're ready to play records.
But not without these six accessories: LAST extra-strength record-cleaning solution #1, LAST record preservative #2, LAST regular record-cleaning solution #3, LAST stylus cleaner #4, a Hunt EDA Mk.6 brush, and a strobe disc (either buy it, or find a used Audio Fidelity record, which has one on the label).
Use #1 on old garage-sale records, then use #2 to prevent wear. Use #3 on new records before you play them, followed by #2. Before playing cleaned and treated records, always use the Hunt brush. And clean the stylus with #4 before each play. Use the strobe disc to adjust turntable speed.
Now, as they say in the biz, enjoy yourself—and break a stylus. Just remember: both the Blue Point and all the phono sections mentioned here need about 20 hours of break-in play before they start to sound right.
Performance: Rotel RP 900/Sumiko Blue Point Combo
There's not enough room in an overview piece like this for a full review Stereophile style. Suffice it to say, for $500 you get genuine high-end performance from the Rotel. My sample ran 2% fast, which I consider unacceptable. I was able to correct the problem by snapping a wide, flat rubber band around the drive hub. The extra thickness got the speed dead on. Whatever ‘table you choose, make sure it plays at the correct speed and/or has some kind of provision for adjustment.
Speed stability was well within acceptable limits—wow and flutter were below what is inherent in off-center LPs (which, unfortunately, is most of them). I compared the LP and CD of Wilson Audio's Fantasies Finesse (W-9432)—a fine, close-perspective recording of a cello/piano duo. David Wilson used a spaced pair of omni Schoeps microphones—I was disturbed by the LP's image wander on the cello until I heard it on the CD, too. This is the result of the miking technique used.
While the LP had a bit more background noise, it also portrayed the duo in a much bigger space, with better focus and a richer harmonic palette. Even though this is a budget analog system, the "believability factor," compared with a very expensive and fine digital system, was far greater on the LP—as it always is—despite residual imperfections. The sense that musicians are playing in your room, or that you're in the space with the musicians, is always greater in the analog domain—and that goes for budget gear like this.
Bass control was particularly outstanding for a ‘table priced this low, though it didn't extend as far down; nor was it as texturally sophisticated as my reference analog or digital systems; nor was it capable of providing the wide dynamic swings of either of the much-higher-priced combos. Nonetheless, the Rotel/Blue Point combo offered the sense of top-to-bottom authority and overall balance one usually associates with far more expensive gear.
The Rotel/Blue Point combo couldn't provide the low-level resolution, the rich three-dimensionality, or image solidity of my TNT/Clavis D.C./Rockport arm combo, nor could it compete in providing the latter's sense of spatial volume and harmonic "rightness’’; but consider the price difference: 00 vs $12,000! On recordings that contain a great deal of inner detail and musical complexity, the budget front-end extracted far more information than I'd expected to get.
The biggest problem with inexpensive analog front-ends is noise (rumble), and that spelled the biggest difference between the Rotel and my reference. The reference brought music out of dead silence. The Rotel revealed low-level noise—until the music started.
As between the two phono stages, both are reasonably priced and well-built, accomplished designs. Neither does anything particularly wrong, but each offers different strengths and weaknesses. The Audio Alchemy VAC-in-the-Box offered a more refined sonic picture, with better focus, better-defined bass, less glare, and a more nuanced portrayal of high frequencies. It presented the entire sonic picture farther back in space—closer to what you get with far more expensive electronics. The Creek excelled in presenting an airier stage, with more lower-midrange warmth and bloom and more three-dimensional images. The Audio Alchemy was drier and more analytical by comparison—closer to the sound I associate with PS Audio gear.
The differences between the two phono sections held even when I switched to Creek's optional power supply ($100), which, while improving the OBH-8's top-to-bottom control, didn't bring the focus, detail, and high-frequency resolution—all of which were impressive regardless of price—up to the level of the Audio Alchemy.
As with the differences between the Blue Point and some of the warmer, mellower cartridges, which phono section you prefer depends on your taste and your choice of cartridge and associated equipment.
Given that the Audio Alchemy offers three gain settings—enough to drive all but the lowest-output moving-coil cartridges—features resistive loading for moving-coils and capacitive loading for moving-magnets, and costs only $60 more than the Creek, it's a better value for the money; though, because of its high noise-floor at the maximum gain setting, I wouldn't use it with very-low-output moving-coil cartridges.
Looking at the build quality and parts layout of the Creek, its price is more than reasonable. Looking at the Audio Alchemy board—densely packed with high-quality parts ingeniously laid out—it's hard to understand how the company can sell the unit for what it does and still make a profit.
Ten years ago I lived, loved, and listened to music on an analog front-end that wasn't as accomplished as the Rotel/Blue Point/Audio Alchemy combo. My records survived; I survived; the recordings I thought were spectacular then proved to be so when played on a luxury system; and while I wouldn't want to go back, I would if I had to, and I'd enjoy listening to music as much as I do on the expensive spread.
You can get into a fine analog system for a grand—this system proves it. Other worthy ‘tables are also available; eg, Rega's Planar 2, SOTA's Moonbeam, and Sumiko's Project 1—all of which will also get you there for less than a grand complete. You can get in for a lot less if you go with a used Dual or some other older ‘table. A world of great music—along with the sonic thrills only analog can provide—will be opened up to you. So now what are you waiting for?
Footnote 1: We apologize to Michael for the omission of his byline from his July “Analog Corner” column. —JA
Footnote 2: For five bucks you can order the service manual for any Dual turntable (and a lot of other vintage audio gear) from A.G. Tannenbaum Electronic Service Data. Tel: (516) 887-0057. Fax: (516) 599-6523.
NEXT: The Analog Experience »
|
| |||||||||
- Log in or register to post comments


| Equipment Reviews | The Gruvy Awards | Blogs Analog Tips | Columns Music | Show Reports | News Resources |
 © 2025 AnalogPlanet
AVTech Media Americas Inc.
All rights reserved