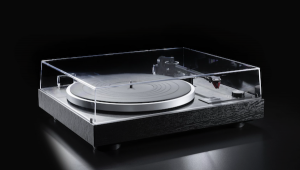
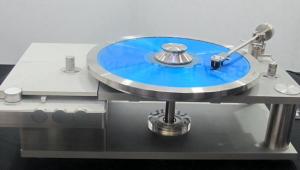
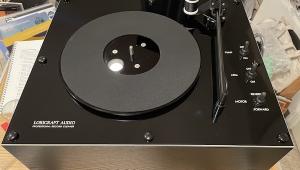
Zorin Audio TP-S3 Turntable and PUS-12 Tone Arm By the Numbers

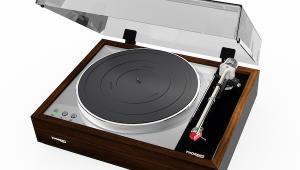
Because of its “plinthless” design, its massive, well-machined 2.25” tall almost 18 pound aluminum platter, and its $4180 price tag the TP-S3 seemed worthy of review.
Zorin’s background is in automobile power train component precision machining, including replacement gears for vintage Porsches. Obviously someone at the company is an audiophile because you don’t shift gears to turntable manufacturing to make a “quick buck”!
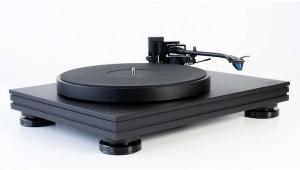
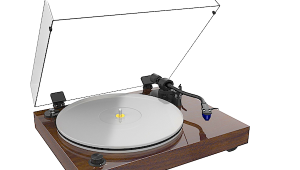
The 12” Zorin PUS-12 tonearm incorporated a few unique design features and its damped, inverted unipivot bearing hit the right notes, especially given it’s $2280 price.
Put together the arm and turntable and you reach $6460, around the same price as a three lettered turntable made in New Jersey. That, I thought made it even more intriguing product review combo (of course there are many other fine turntable and arm combos at this same price point. That one just came to mind when I saw the price).
Set-Up
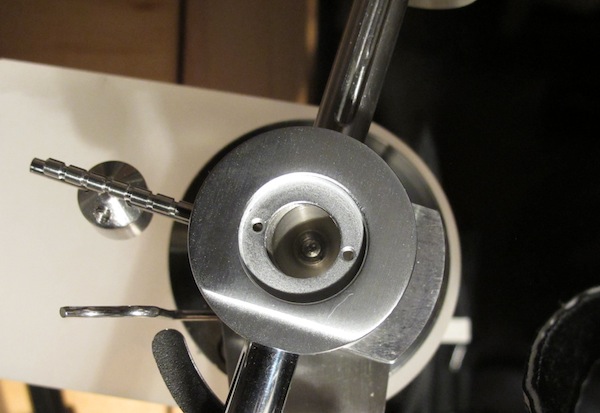
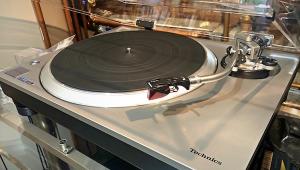
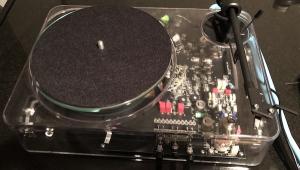
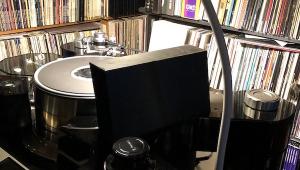
The TP-S3 sets up quickly. Three tubular arms of polished aluminum extend equidistantly from the generously-sized central hub that holds the inverted ceramic bearing. Massive stainless steel cylinders, capped on top and on bottom terminated with adjustable pointed feet attach to each arm.
Thus there is no boxy “plinth” in need of damping. The first time I learned the benefits of such a design was when I reviewed the compact Simon Yorke S-7 way back in 1998. At the time I owned a VPI TNT— a large-plinthed “four-poster” actually designed with the Eminent Technology air bearing tone arm in mind.
The E.T. arm featured a fixed bearing and a moving rail, similar to the one currently used by Walker Audio. In fact, the original Walker ‘table was a highly modified Mapleknoll, also designed by E.T.’s Bruce Thigpen. Walker has since changed everything though the basics remain similar.
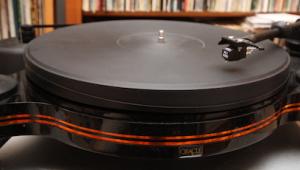
As that massive rail moves, the weight shifts from the front to the back of the ‘table. Some three point suspension ‘tables like the Oracle simply cannot adequately accommodate such a “mass migration”, which led VPI’s Harry Weisfeld to design the “four poster”. I think Basis Audio’s A.J. Conti claims to have been there first, but I’m not about to get in the middle of that shit fight.
In any case, the Simon Yorke consists of a heavy, 6” round stainless steel base that’s precision-drilled for the low-friction spindle sleeves, forming a very rigid, massive, stable support mechanism for the platter. A pear-shaped plywood-like composite arm board bolts to the top of the base. A 24 pound platter of mostly Austenitic nonmagnetic stainless steel to which is attached the spindle bearing fits in the hole and that’s it! Everything else is outboard.
The first time I heard that Yorke’s slam and punch my entire notion of turntable design dramatically changed. That is part of what attracted me to the Zorin.
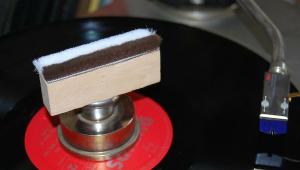
The massive aluminum platter is “machined out” on bottom to locate the mass near the platter’s outer edge, producing a flywheel effect. The polished ceramic bearing runs on a thin oil layer so before placing the platter atop the bearing, one carefully places the tiny ceramic ball atop the bearing, drips some oil on it and on the bearing and then carefully lowers the platter.
The outboard AC synchronous motor housed in a heavy pod drives the platter via an “O” ring around its periphery. A dual ganged pulley machined from a plastic of some sort allows you to select 33 1/3 or 45rpm.
Installing the PUS-12 Tonearm
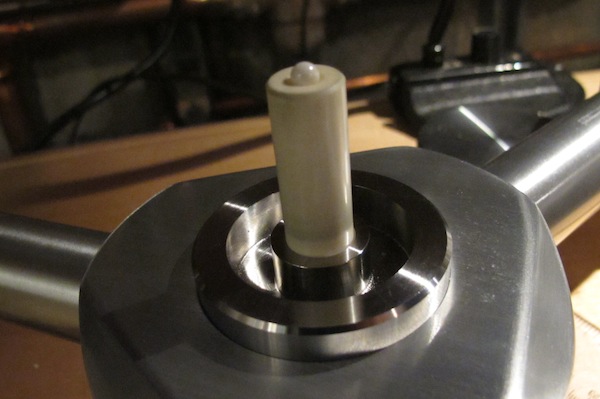
Removing the cap atop the stainless steel cylinder at the approximately “2 O’clock” position reveals a thick piece of plastic fastened in place by a large bolt. Remove the bolt and the plastic piece, replace it with the equally thick plastic arm board drilled for your favorite tone arm (or the PUS-12), replace the bolt and you’re ready to install the tone arm. It’s probably possible to install arms at the other too.
Once that’s been accomplished you have to measure the pivot-to-spindle distance and by rotating the arm board around the not yet tightened bolt, set the PSD (pivot to spindle distance) for your particular tone arm and then tighten the bolt.
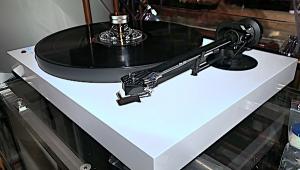
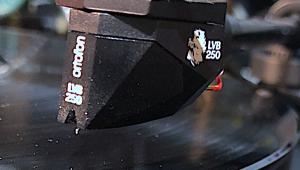
The PUS arm is a static balance design (the pivot's center of gravity is below the pivot point, which means you should carefully set vertical tracking force at record height to get an accurate measurement), with an effective length of 308mm, overhang of 13mm and an offset angle of 17.6 degrees.
The PUS 12 arm’s post slides into a collar in standard fashion where its held in place by a grub screw after you’ve approximated its level position with the platter. The fit is impressive. There’s zero play. The unipivot arm will now be leaning well over to right side until you attach the azimuth adjustment weight to a rod extending from the left side of the bearing housing, which will right the arm’s-one sided list.
The arm comes with a pair of counterweights one of which also includes a means by which you can attach an additional cylindrical weight if necessary. Start with one of the weights, slide it onto stub and tighten the grub screw. Since azimuth is set using the weight previously placed on the rod extending from the side of the pivot hub, there’s no need to rotate the counterweight as on the VPI arm, so a channel machined into the counterweight stub vertically orients the counterweight.
The instructions are unintentionally humorous with warning after warning about over-tightening the various grub screws. Clearly the importer knows his audience!
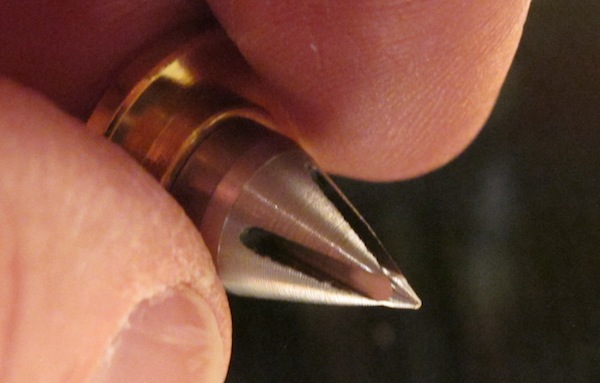
Next comes the most critical part of the arm set-up: unscrewing the two small screws atop the pivot housing that hold in place the inverted bearing. Care must be taken to avoid losing the two tiny screws!
To prevent damage to both the bearing point and cup, Zorin places a small piece of foam rubber in the cup that must carefully be removed before you pour in about a 1/3 of the way up the cup the supplied damping fluid after which you carefully replace the inverted bearing point, locate the two small screws in the holes and secure the bearing.
Should you wish greater damping you can use a more syrupy fluid as suggested in the manual. By the way, the machining of the inverted bearing appears to be superb and the “fit’n’finish of it all is very nicely executed despite the very reasonable price. The only oddity here is the tone arm lock: after you place the arm tube in the very nicely machined armrest, you screw in what looks like a cartridge bolt that fits over the top of the tube—a rather primitive touch! Either that or the designer has a great sense of humor!
Next you install the anti-skating counterweight attached to an “O” ring by a length of monofilament. Pretty much standard fare here.
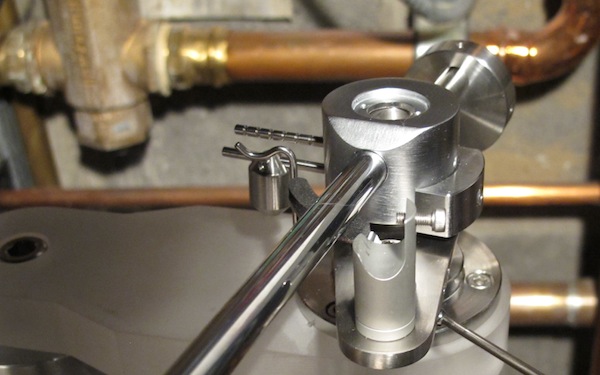
The Patented Adjustable Head Shell
. Zorin’s unique head shell consists of a three thick, machined pieces of aluminum. One attaches via two bolts to the side of the “L” shaped arm termination block out of the center of which come the four wires terminated with color coded clips.

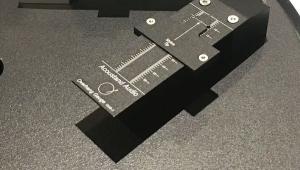
Another piece of machined aluminum attaches via a single bolt on top of the first piece, forming an adjustable horizontal hinge. This is most unusual in that this hinge sets the usually fixed offset angle. The hinge bolt is set tight at the factory for the correct 17.6 degree angle but Zorin supplies a plastic gauge to confirm the angle.
The cartridge mounts to the third machined piece, attached at a right angle to the second one by a bolt set in a slot that allows it to be slid fore and aft as well as angled up and down.
In other words, you set overhang by sliding this piece back and forth and once set, you can radically adjust VTA/SRA by rotating the piece on its horizontal axis. Or you can set VTA/SRA by loosening the stem grub screw and raising and lowering the back of the arm. Or you do it using a combination of the two.
The only trick with doing it from the front is that when you loosen the bolt you must prevent it from fore and aft movement or you’ll lose your overhang setting.
The greatest advantage of this patented head shell is the vast expanse of open space behind the cartridge. It makes it so easy to attach the clips. Sort of the opposite of SME head shells where the cartridge pins often butt up against the head shell pins leaving almost no room for the two sets of clips (SME owners will know what I mean).
Once you get the hang of this unusual, unique but sensible tone arm, setting it up becomes fairly straightforward. Howeer, though you can adjust overhang, VTF, VTA/SRA, anti-skating and azimuth, as with SME arms, you cannot adjust the zenith angle because the screw holes through which you mount the cartridge are not slotted so you can’t twist the cartridge about its vertical axis (in other words you can’t twist it horizontally).
The only way to do it then would be to loosen the offset screw and change the offset angle—a move I wouldn’t recommend. This is less of a problem than it might seem assuming the cartridge has been correctly built: the cantilever will be parallel to the hash marks at the “null” points on whatever alignment tool you choose to use.
Of course as we’ve demonstrated with digital microscopy, even if the cantilever alignment is perfect there’s no guaranty the diamond has been perfectly oriented in the cantilever so achieving perfection in this parameter is “iffy” anyway. As I tell attendees at my turntable set-up seminars, “If you want perfection, buy a CD player.”
You can set VTA/SRA in one of two ways: by raising and lowering the back of the arm or by loosening the cartridge mount and rotating it. That produces large VTA/SRA excursions since it’s happening at “cartridge level” and you risk throwing off the overhang if the mount slides in the overhang slot.
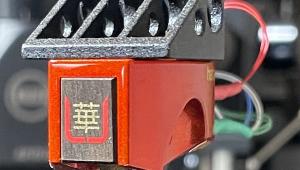
I first set up the Shure M97xE and then moved on to the Lyra Titan i, which is what I used for most of the auditioning.
The arm “handles” well (though as with all 12” arms, it’s a bit ungainly compared to a 9” arm) and because it is fluid-damped at the closed, inverted pivot point it doesn’t shimmy side-to-side before it settles in the groove like VPI’s or Spiral Groove’s Centroid arm.
I’ve found that while those arms look unstable going in, once there both are extremely stable. However, some find the look of these arms rocking back and forth unsettling. Not a problem here.
Because the arm and ‘table present two variables it’s impossible to present a sonic assessment of the arm separated from the ‘table and vice-versa.
|
| ||||||||||


| Equipment Reviews | The Gruvy Awards | Blogs Analog Tips | Columns Music | Show Reports | News Resources |
 © 2025 AnalogPlanet
AVTech Media Americas Inc.
All rights reserved