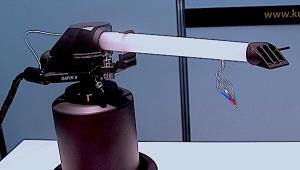
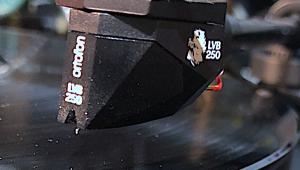
Tone Arm Geometry 101

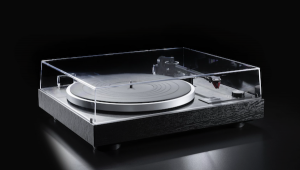
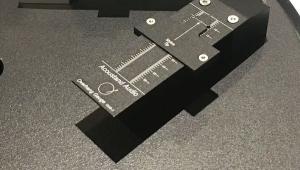
The meaning of the blue line labeled “pivot to spindle” is obvious. If your turntable is factory pre-drilled and fitted with the brand’s tone arm (Rega, Pro-Ject, Music Hall, VPI, etc.) you can be pretty sure the P2S (pivot to spindle) distance is correct but it wouldn't hurt to double check.
If you buy a used ‘table that’s been pre-drilled and fitted with a secondary manufacturer’s arm, it’s a good idea to check the P2S distance either by using a protractor that has a measuring beam (Feickert, Dennesen, etc.) or if you don’t have one of those, by using a ruler marked in millimeters.
The most accurate way to do this is to get a plastic ruler and drill a spindle sized hole in it with the hole’s center at the “0” millimeter mark. If the horizontal bearing’s center is not clearly marked atop the bearing housing (many are not, including Rega’s, Graham, etc.) the best way to get an accurate measurement is to remove the arm altogether and measure to the armboard hole’s center point (that in and of itself is not so easy to do, but it is possible with some effort).
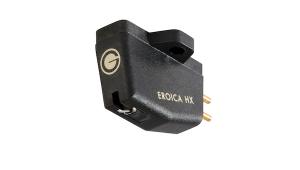
Fortunately, there is some room to compensate for P2S distance error here in the form of head shell slots, which are necessary since the distance from the cartridge fixing screws to the stylus tip has never been standardized (this doesn’t apply to SME arms where the head shell holes are not slotted but instead the arm pivot slides).
Now look at the red line labeled “effective length”. It’s drawn from the pivot point to the stylus tip, which also intersects with the purple arc labeled “arc traced by stylus tip”. Note at the spindle end of the purple arc the green/blue line labeled “overhang”. The “overhang” is literally the amount by which the stylus tip “overhangs” the spindle when the arm is placed directly above the spindle. The “effective length” is equal to the pivot to spindle distance plus the overhang.
Now note the two parallel lines labeled “linear offset”, one well in front of the spindle and the other running from the pivot point and terminating at a right angle with another line drawn through the center of the head shell (and through the cantilever center).
Note the arc labeled “offset angle”. That is the angle formed by the effective length line drawn from the pivot point to the stylus tip and the line running through the head shell and cantilever that terminates at each end at right angles to the two parallel “linear offset” lines.
Friction produced by the stylus coursing through the grooves creates a drag force along the dashed/maroon line. Were it not for the offset angle, much of the frictional force would exert “drag” directly in line with the pivot point. However, the drag’s offset from the pivot produces a “component vector force” that “skates” the arm clockwise towards the spindle.
Then why have an offset angle? Because it creates lower HTA (horizontal tracking error) and less distortion. Why? Because as the stylus travels along its entire arc, the cantilever is closer to the groove tangent originally traced by the cutting cantilever/stylus and thus it remains closer to groove tangency.
This geometry produces two “null points” where the cantilever is tangent to the groove. At those points HTA is zero (note: the longer the tone arm’s effective length, the smaller the offset angle. A smaller offset angle produces less skating. That is one of the advantages of a longer tone arm).
Now look at the long and short green radii. In this illustration, the shorter radius runs from the spindle to the stylus, which, at that stylus location along the arc, results in a tangent cantilever to the groove. That point along the stylus tip arc is labeled “In NP” (inner ‘null point’). The radius is also parallel to the two linear offset lines.
Now imagine swinging the tone arm outward towards the “outer groove” and having linear offset and offset angle moving along with it. The second point at which the cantilever is tangent to the groove is the “outer null point”. Mathematically speaking, once you’ve located the "inner null point", there can be only one, easily determined outer null point location.
When you use a gauge or protractor to set the “overhang” you are setting it at one of the two “null points” and possibly confirming it by also checking the second one. For instance, if you have a Rega or Pro-Ject turntable that includes a piece of paper with a pair of grids in which each is located a tiny dot or “X”, those are the two “null points”.
When you achieve a cartridge location in the head shell where the stylus sits on the dot or “X” and the cantilever is parallel to the grid lines of one of the two grids, it will also be parallel in the other grid.
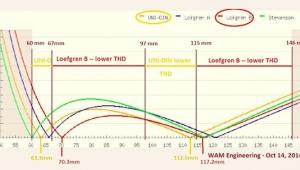
Of course there are numerous possible alignment geometries (Loëfgren, Baerwald, Stevenson, UNI-DIN, etc.), each of which locates the two null points at different locations across the arc and each of which has different amounts of distortion at various points along the arc.


| Equipment Reviews | The Gruvy Awards | Blogs Analog Tips | Columns Music | Show Reports | News Resources |
 © 2025 AnalogPlanet
AVTech Media Americas Inc.
All rights reserved