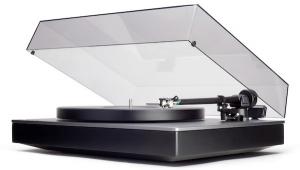
The Schiit SOL Turntable (Updated 10/26/2020)

That said, if you want an “open the box, plug and play” type turntable, the SOL might not be for you. On the other hand, if you buy one with the cartridge already installed, Schiit makes the Sol reasonably easy to set up.
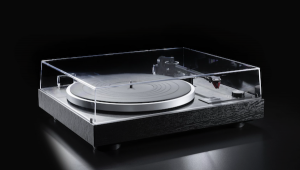
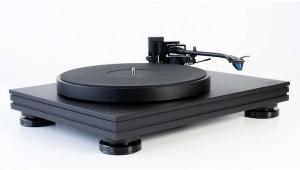
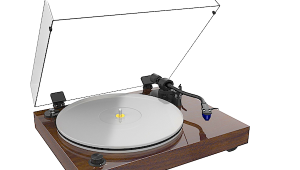
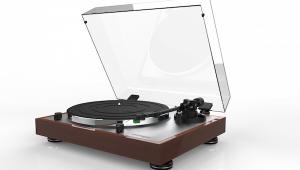
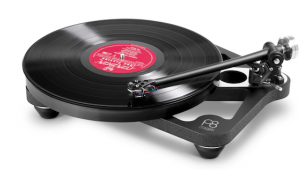
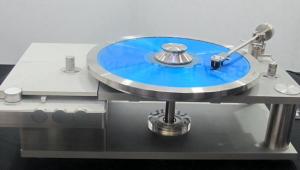
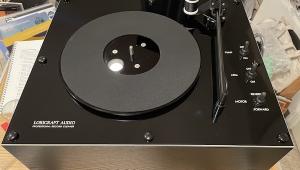
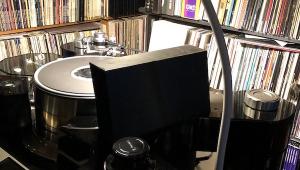
But let’s start at the beginning with the concept: a “plinthless” turntable made of metal, not plastic, with an outboard A.C. synchronous motor topped with a stepped 33 1/3/45rpm machined metal pulley, complete with a fully adjustable 278mm effective length unipivot tonearm featuring a carbon fiber arm tube. Add a relatively high mass machined aluminum platter weighted around its perimeter for “flywheel” effect and topped with a thick cork mat, riding on a beefy, inverted ball type spindle bearing. That’s an awful lot to accomplish for $799 made in U.S.A.

“Fixes” exist, but these add to the cost and sometimes create their own technical issues (like a motor suspension that isolated vibrations but also causes the belt to move relative to the platter thus causing speed variations), and of course plinths have to be painted or veneered, which adds unnecessarily to the cost.
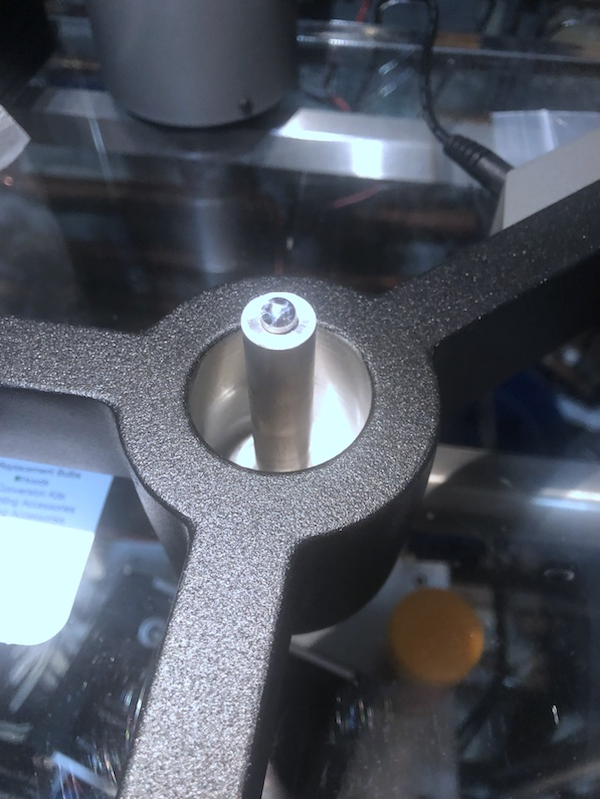
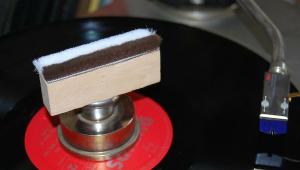
Schiit chose to eliminate the “drummy” plinth, replacing it with a cast aluminum “tripod” with a central spindle bearing and featuring one longer leg to provide both rigid tonearm support as well as sufficient distance from the spindle. The casting also includes a fixture for the cueing platform. Schiit saves considerable money here, replacing the more typical and costly damped arm lift mechanism (look for one online and you’ll see they cost between $70 and $100) with a non-damped but easy to use cam-type lifter that you’ll quickly get used to.
A panel attached to the left side of the longer leg contains the RCA jacks, a ground lug and an “on/off” slide switch as well as power jacks.
The generously lengthy (11” effective length) tonearm features a carbon fiber tube and a unipivot bearing system that provides all possible adjustments—including one useful one that in my experience was available only on one other arm costing thousands of dollars.
Set-Up
For unboxing and set-up watch the Schiit YouTube video:
One thing to keep in mind: you must provide the level platform upon which to place the tripod because the feet are not adjustable. A level platform is critical. Learning how to place the O-ring belt around the platter and motor pulley is definitely a “learned” skill set as you’ll find out so be sure to take care doing it (make sure the stylus guard is in place) and don’t get frustrated if it falls off a few times before you get it done!
I encountered a small issue upon set up: after flipping the motor switch, the platter did not spin. Before panicking I felt the motor pod to see if it was vibrating, which it was. I’ve seen this before: in shipping the pulley sometimes gets pressed down against the motor housing. Loosening a set screw and raising the pulley on the motor shaft solved the problem. I bet Schiit gets more than a few panicked calls about that (or maybe not).
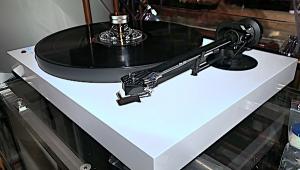
The Schiit Arm
The Schiit arm has a 265mm P2S (pivot to spindle) distance and an overhang of 13.828, which produces an effective 278.828mm (11”) length.
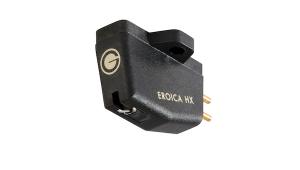
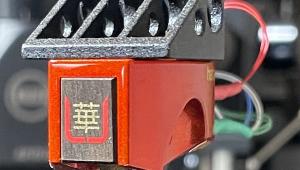
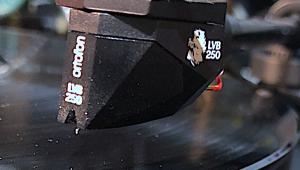
Schiit sent three easy to “drop in” arms: one without cartridge and two ready to use with cartridges they offer: one with the “thrown in” Audio-Technica AT-VM95EN and the other with the high output version of Grado’s $275 Timbre Series Opus3, which Schiit will sell you instead of the Audio-Technica for an additional $156. I wrote about the Opus3 in another turntable review.
I realize Schiit wants to make this all as simple as possible and that’s laudable but in the “Getting Started” section under “Tonearm Setup” it says after you place the arm on the pivot pin (with stylus guard on the cartridge) if the arm is “overbalanced” and doesn’t rest on the cueing shelf but instead leans backwards or worse, falls off, loosen the counterweight and slide it in until the arm rests on the cueing shelf.
Okay, that makes sense but then the instructions go on to get you ready to play a record and “enjoy” without warning you to correctly set the tracking force!. Of course, turntable veterans will know to do this but the others? Maybe not!
The arm allows you to adjust every set up parameter: tracking force, VTA/SRA (on the fly), azimuth (which the manual calls “cartridge angle”—and which in the case of an unrestricted unipivot is critical) and of course anti-skating using a monofilament/weight arrangement. Schiit provides various weights and wrongly suggests using a grooveless record to set anti-skating so the stylus doesn’t drift either in or out. You should, if you are using a blank record, set it so the stylus drifts slowly inward. Why? Please check this out.
There’s one additional and very useful adjustment I’ve seen only once on an arm and that’s labeled “Tonearm Height”, which could lead some to confuse that with the VTA/SRA adjustment that also adjusts “tonearm height”.
While the instructions say this setting “adjusts tonearm pivot cup height”, it really does not! The pivot cup itself remains fixed in height while the large tonearm ring and thus the arm tube itself can be either raised or lowered within the limits of the pivot cup cylinder’s vertical travel.
The other arm that offers something similar is the original Immedia RPM 2.
Ideally you want the arm pivot at the “plane of record play”. Very few arms do that. The unipivot Immedia allows you to permanently set the bearing cup at record height. Adjusting VTA/SRA via a screw set in the pivot center that rests on the cup, raises and lowers the arm without changing the pivot cup height. Unique!
The Schiit arm arrangement is thus very similar though here you can also raise or lower the arm via the main shaft. After installing your cartridge and with the VTA/SRA fully down, if the arm tube if not parallel to the record, you can adjust “tonearm height” to get it level, which of course is only the starting point for setting VTA/SRA. If you use a digital microscope to set this, ideally, if possible, you’d raise or lower the “tonearm height” adjustment rather than use the VTA/SRA adjustment. That way, you’d get correct VTA/SRA and maintain the bearing height at the plane of record play. Or use a combination of both.
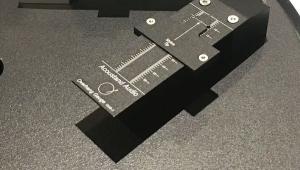
Schiit also supplies a useful paper alignment gauge (assuming you accurately punch the spindle hole) sensibly calculated for Löfgren A but offers overly simplified alignment instructions that based on years of experience helping readers, I’m certain some new to vinyl will misconstrue. The instructions advise you to “align cartridge to either grid” but fail to tell you to first be sure the stylus rides on the arc across the entire record surface! If you just “align to either grid” you’ve accomplished nothing.
Be very careful routing the tonearm wires from where they exit the bearing ring to where you plug in the multi-pin connector so that the arm doesn’t bind across the record surface. Schiit doesn’t pay sufficient attention to this in the set-up instructions. No matter how you do it, it will always appear to be interfering with arm travel, but I found it never did.
|
| |||||||||


| Equipment Reviews | The Gruvy Awards | Blogs Analog Tips | Columns Music | Show Reports | News Resources |
 © 2025 AnalogPlanet
AVTech Media Americas Inc.
All rights reserved